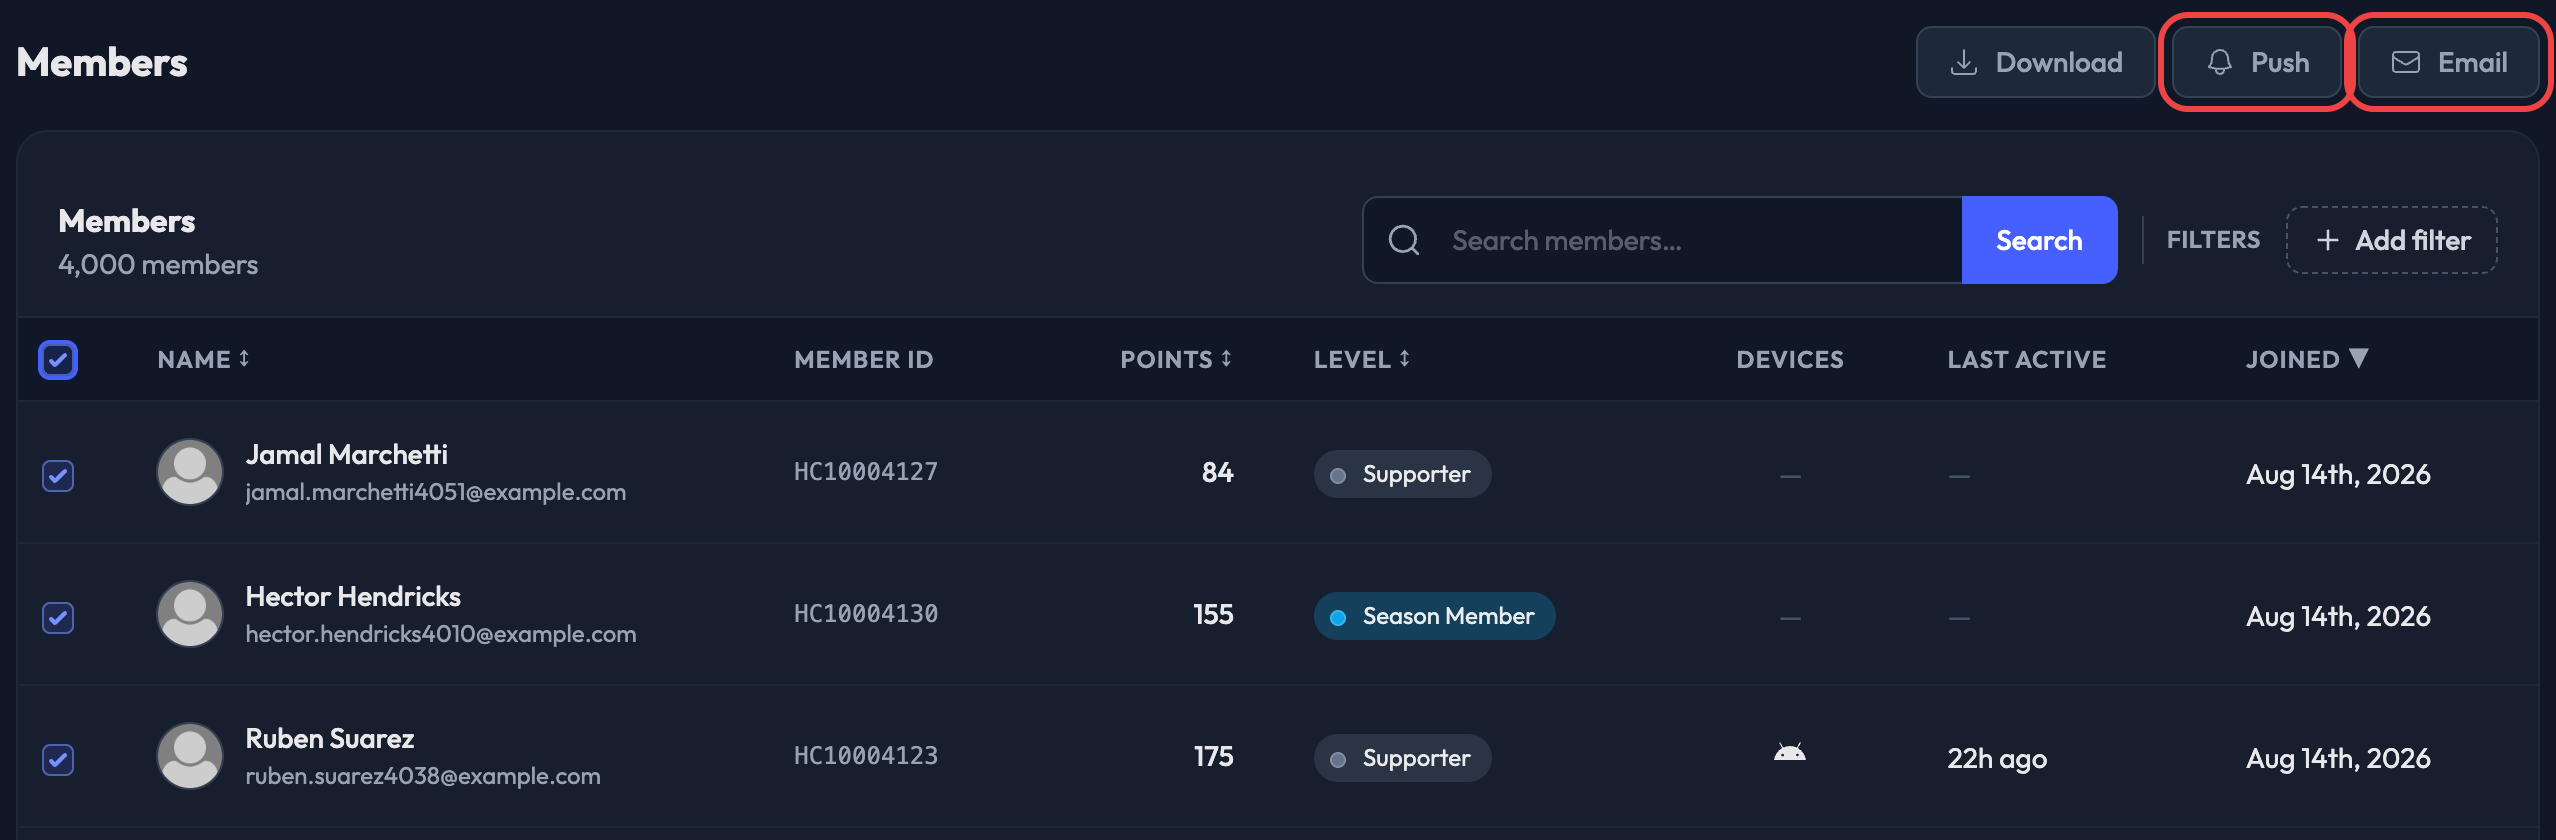
You can send emails and push notifications to your members from the Members page in the admin. Push and Email sit in the top right and each opens a composer right on the page.
You have two ways to pick your audience, and you set both up before you open the composer:
Filter the list. Use the Filters chips beside the search box to narrow by Level, Status, Points or Tags. Whatever the filters match becomes your audience.
Check individual members. Tick the box on any row, or use the checkbox in the table header to select every row on the page.
Inside the composer you then pick the audience explicitly:
Selected members — the rows you checked. Only offered when you've checked at least one.
All matching filters — everyone your filters match. The composer shows you the recipient count before you send.
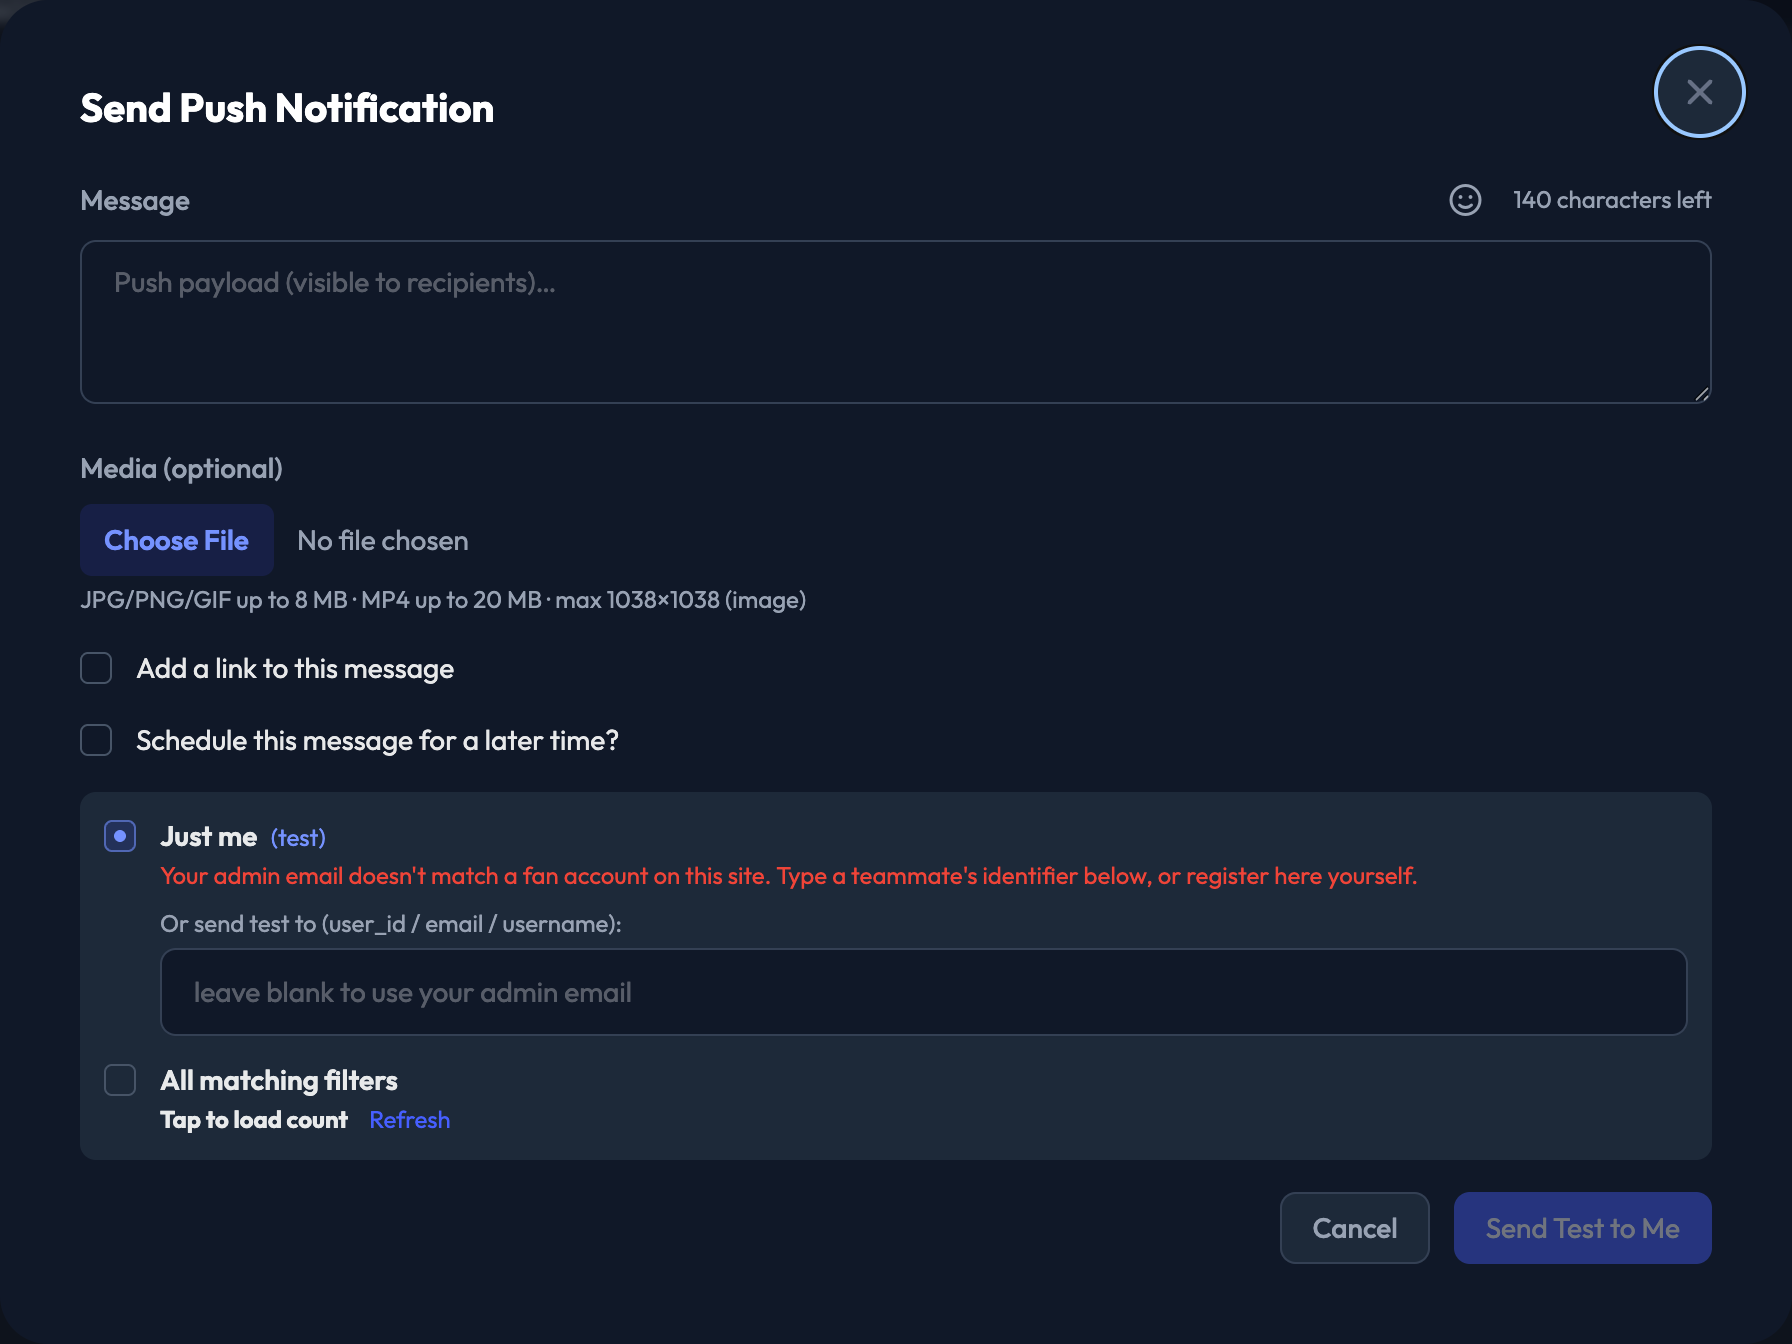
Just me (test) — push only. Sends to your own account so you can see exactly what fans will see.
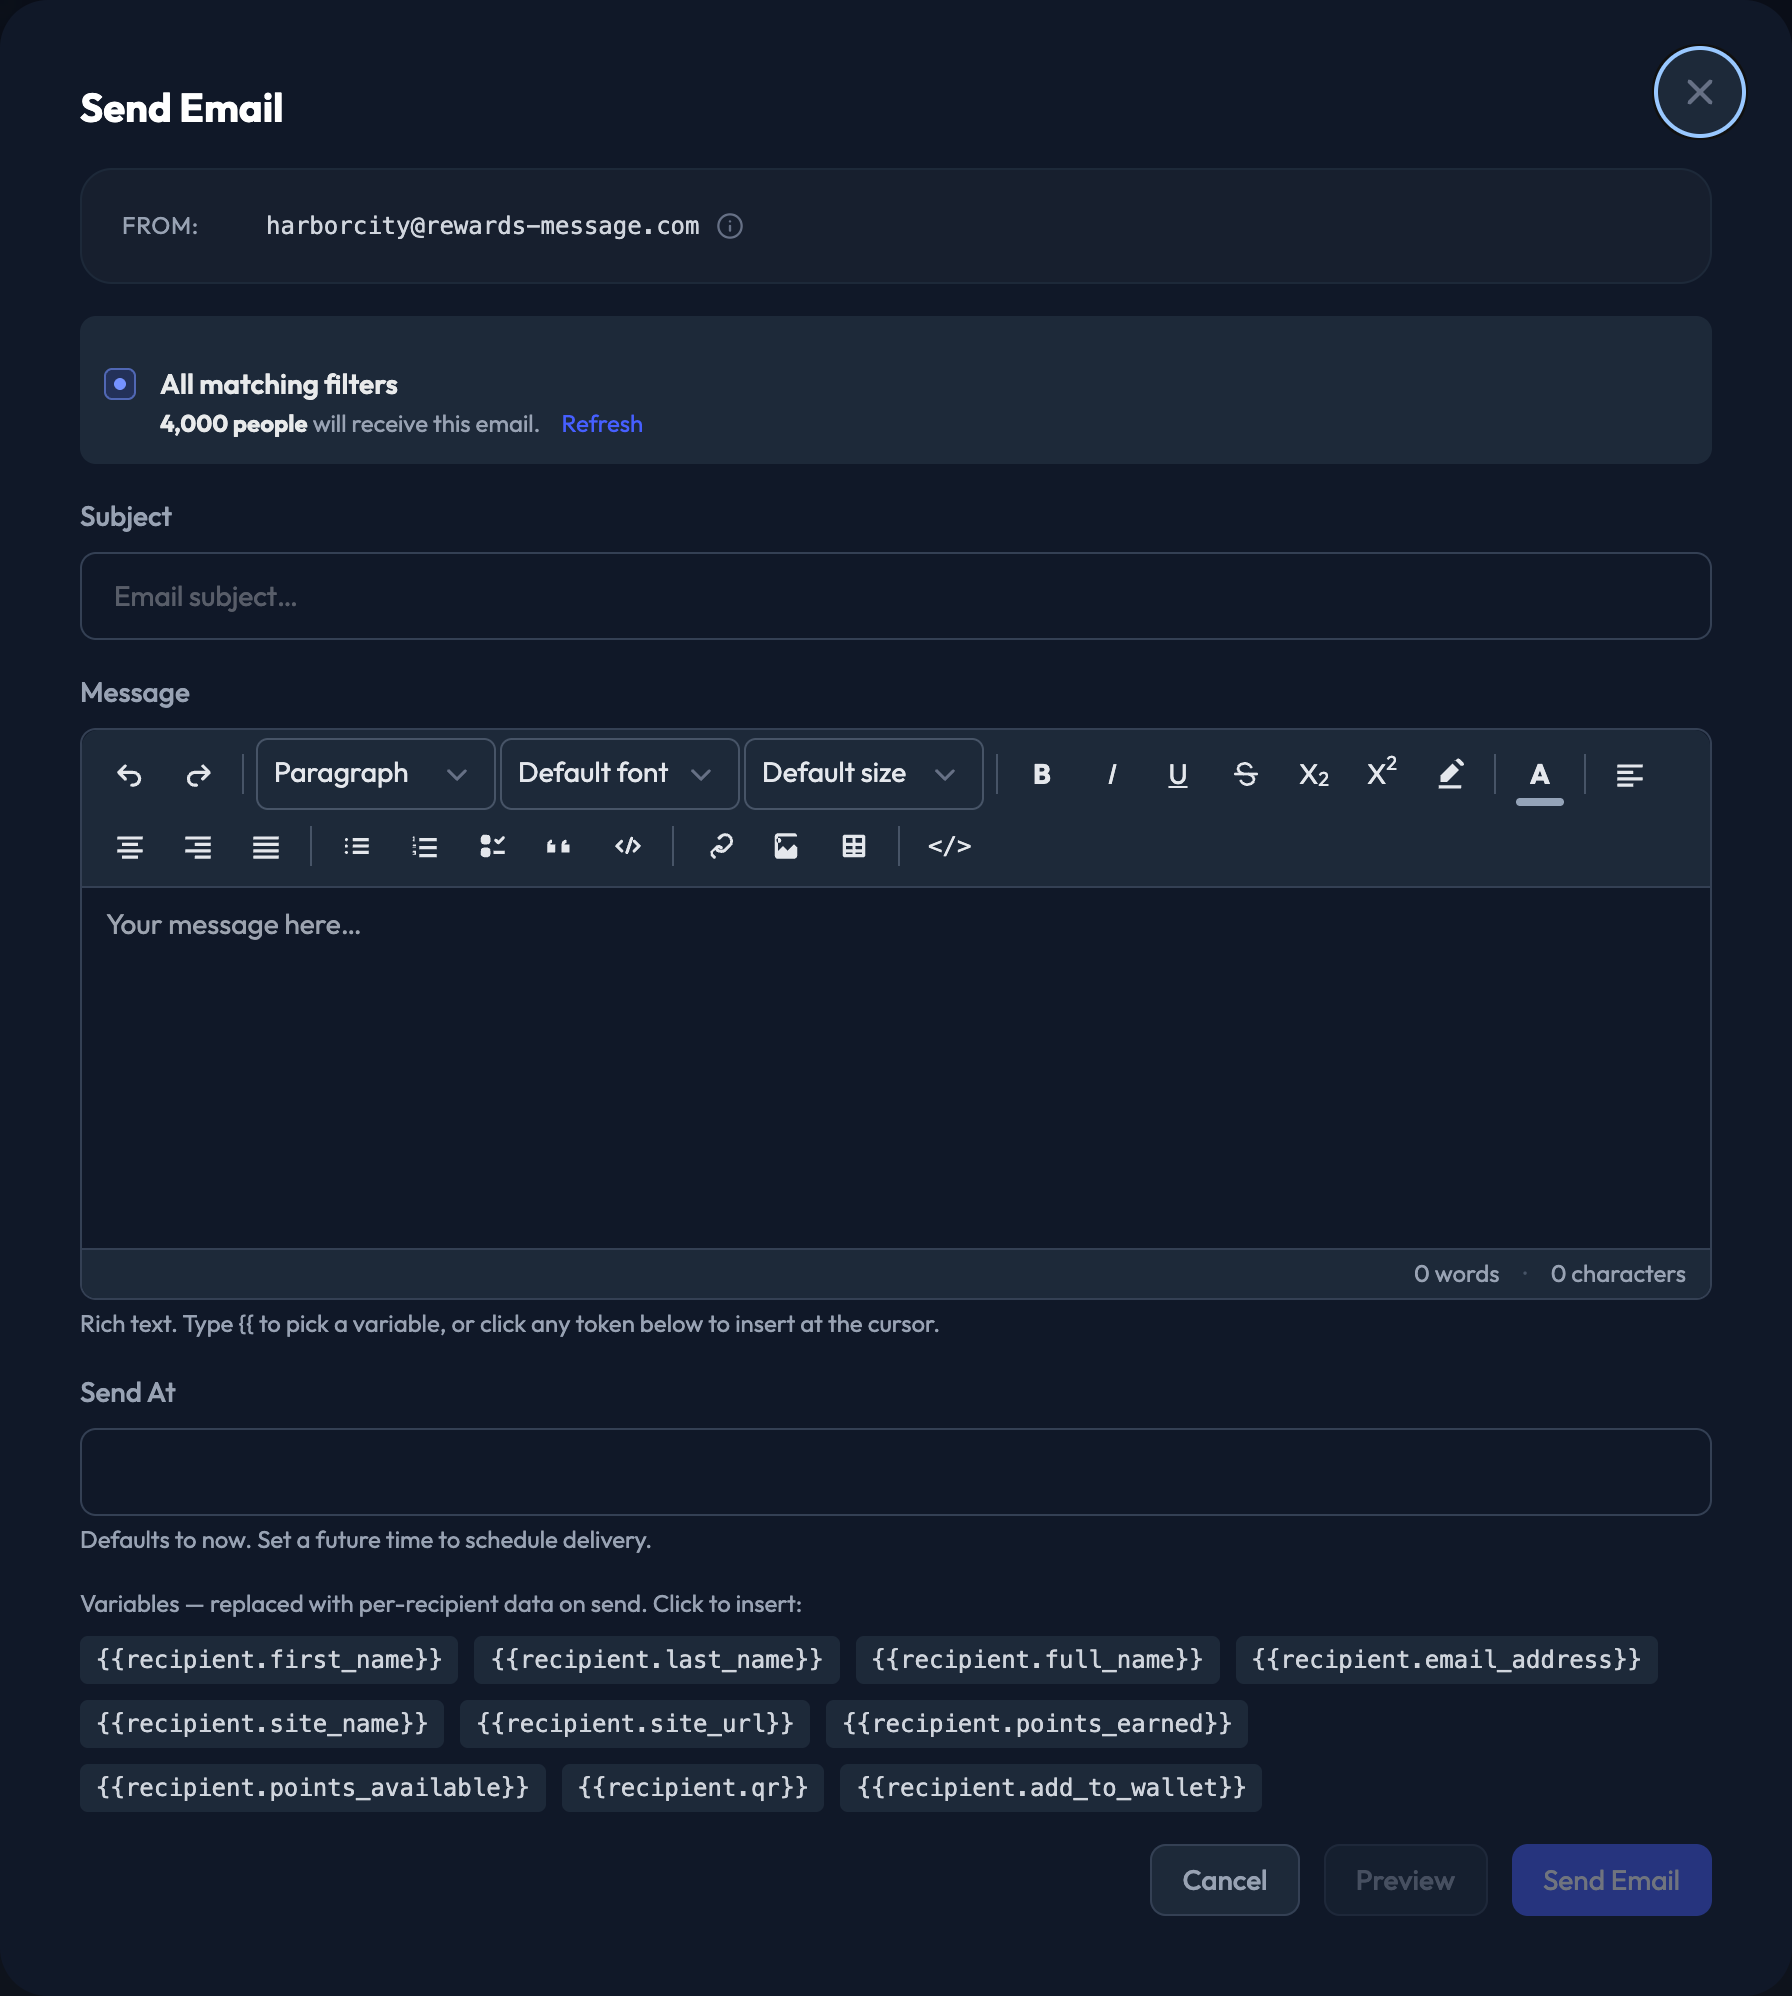
1. Click Email.
2. Choose your audience. The From address is shown at the top — it's set by your site's email slug, and it's changed under Communications › Email Settings.
3. Write the Subject.
4. Write the Message. It's a full rich-text editor.
5. Optional: set Send At to schedule delivery. It defaults to now.
6. Click Preview to see the email as it will arrive, then Send Email.


1. Click Push.
2. Write the Message — 140 characters or fewer. The counter above the box tells you how many you have left, and there's an emoji picker beside it.
3. Optional: add Media. JPG/PNG/GIF up to 8 MB, or MP4 up to 20 MB; images max 1038×1038.
4. Optional: tick Add a link to this message, then choose what to link to — an Event, Auction, Prize, Sweepstakes, or a URL — and pick the destination.
5. Optional: tick Schedule this message for a later time? and set Send At.
6. Choose your audience and send.