To let Fanmaker track merchandise sales and integrate with your Shopify store, our development team needs temporary administrative access to your Shopify backend.
Follow these steps to provide the information and access we need.
We need your internal Shopify store URL to start the connection. Send it to [email protected] and your Fanmaker Partner Success Manager.
This should be your myshopify.com URL (e.g. your-team-name.myshopify.com).
Do NOT send your custom domain (e.g. www.teamstore.com).
1. Log in to your Shopify Admin dashboard.
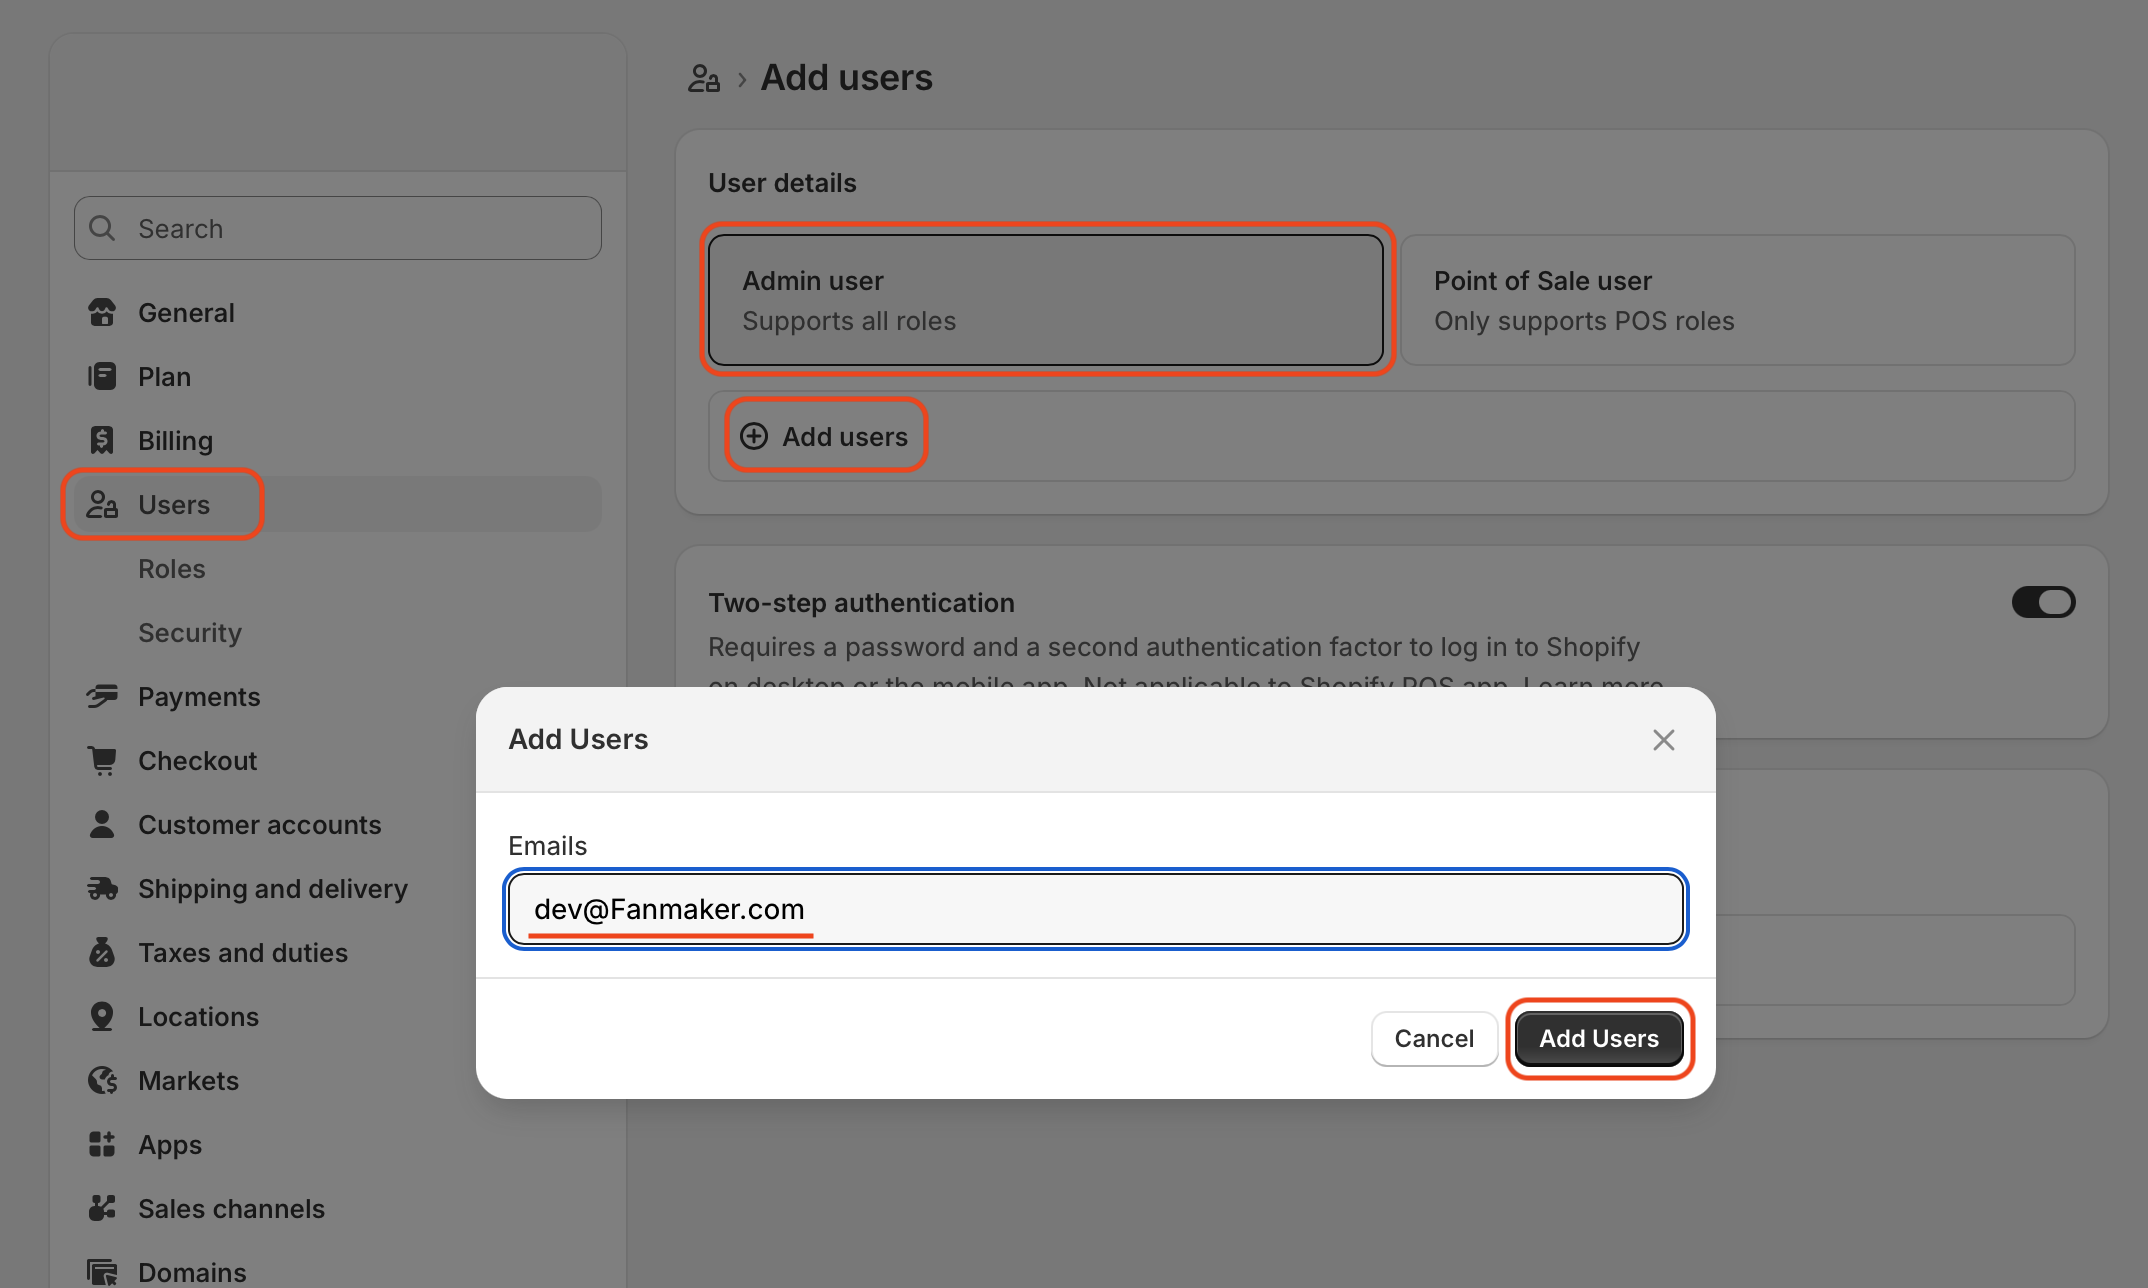
2. Navigate to Settings > Users and Permissions (or the User tab).
3. Make sure Admin user is selected (Supports all roles).
4. Click Add users.
5. In the Emails field, enter: [email protected].
1. Scroll down to the Roles section.
2. Click Assign.
3. Select the Administrator system role. This grants the permissions Fanmaker needs to configure the API and webhooks.
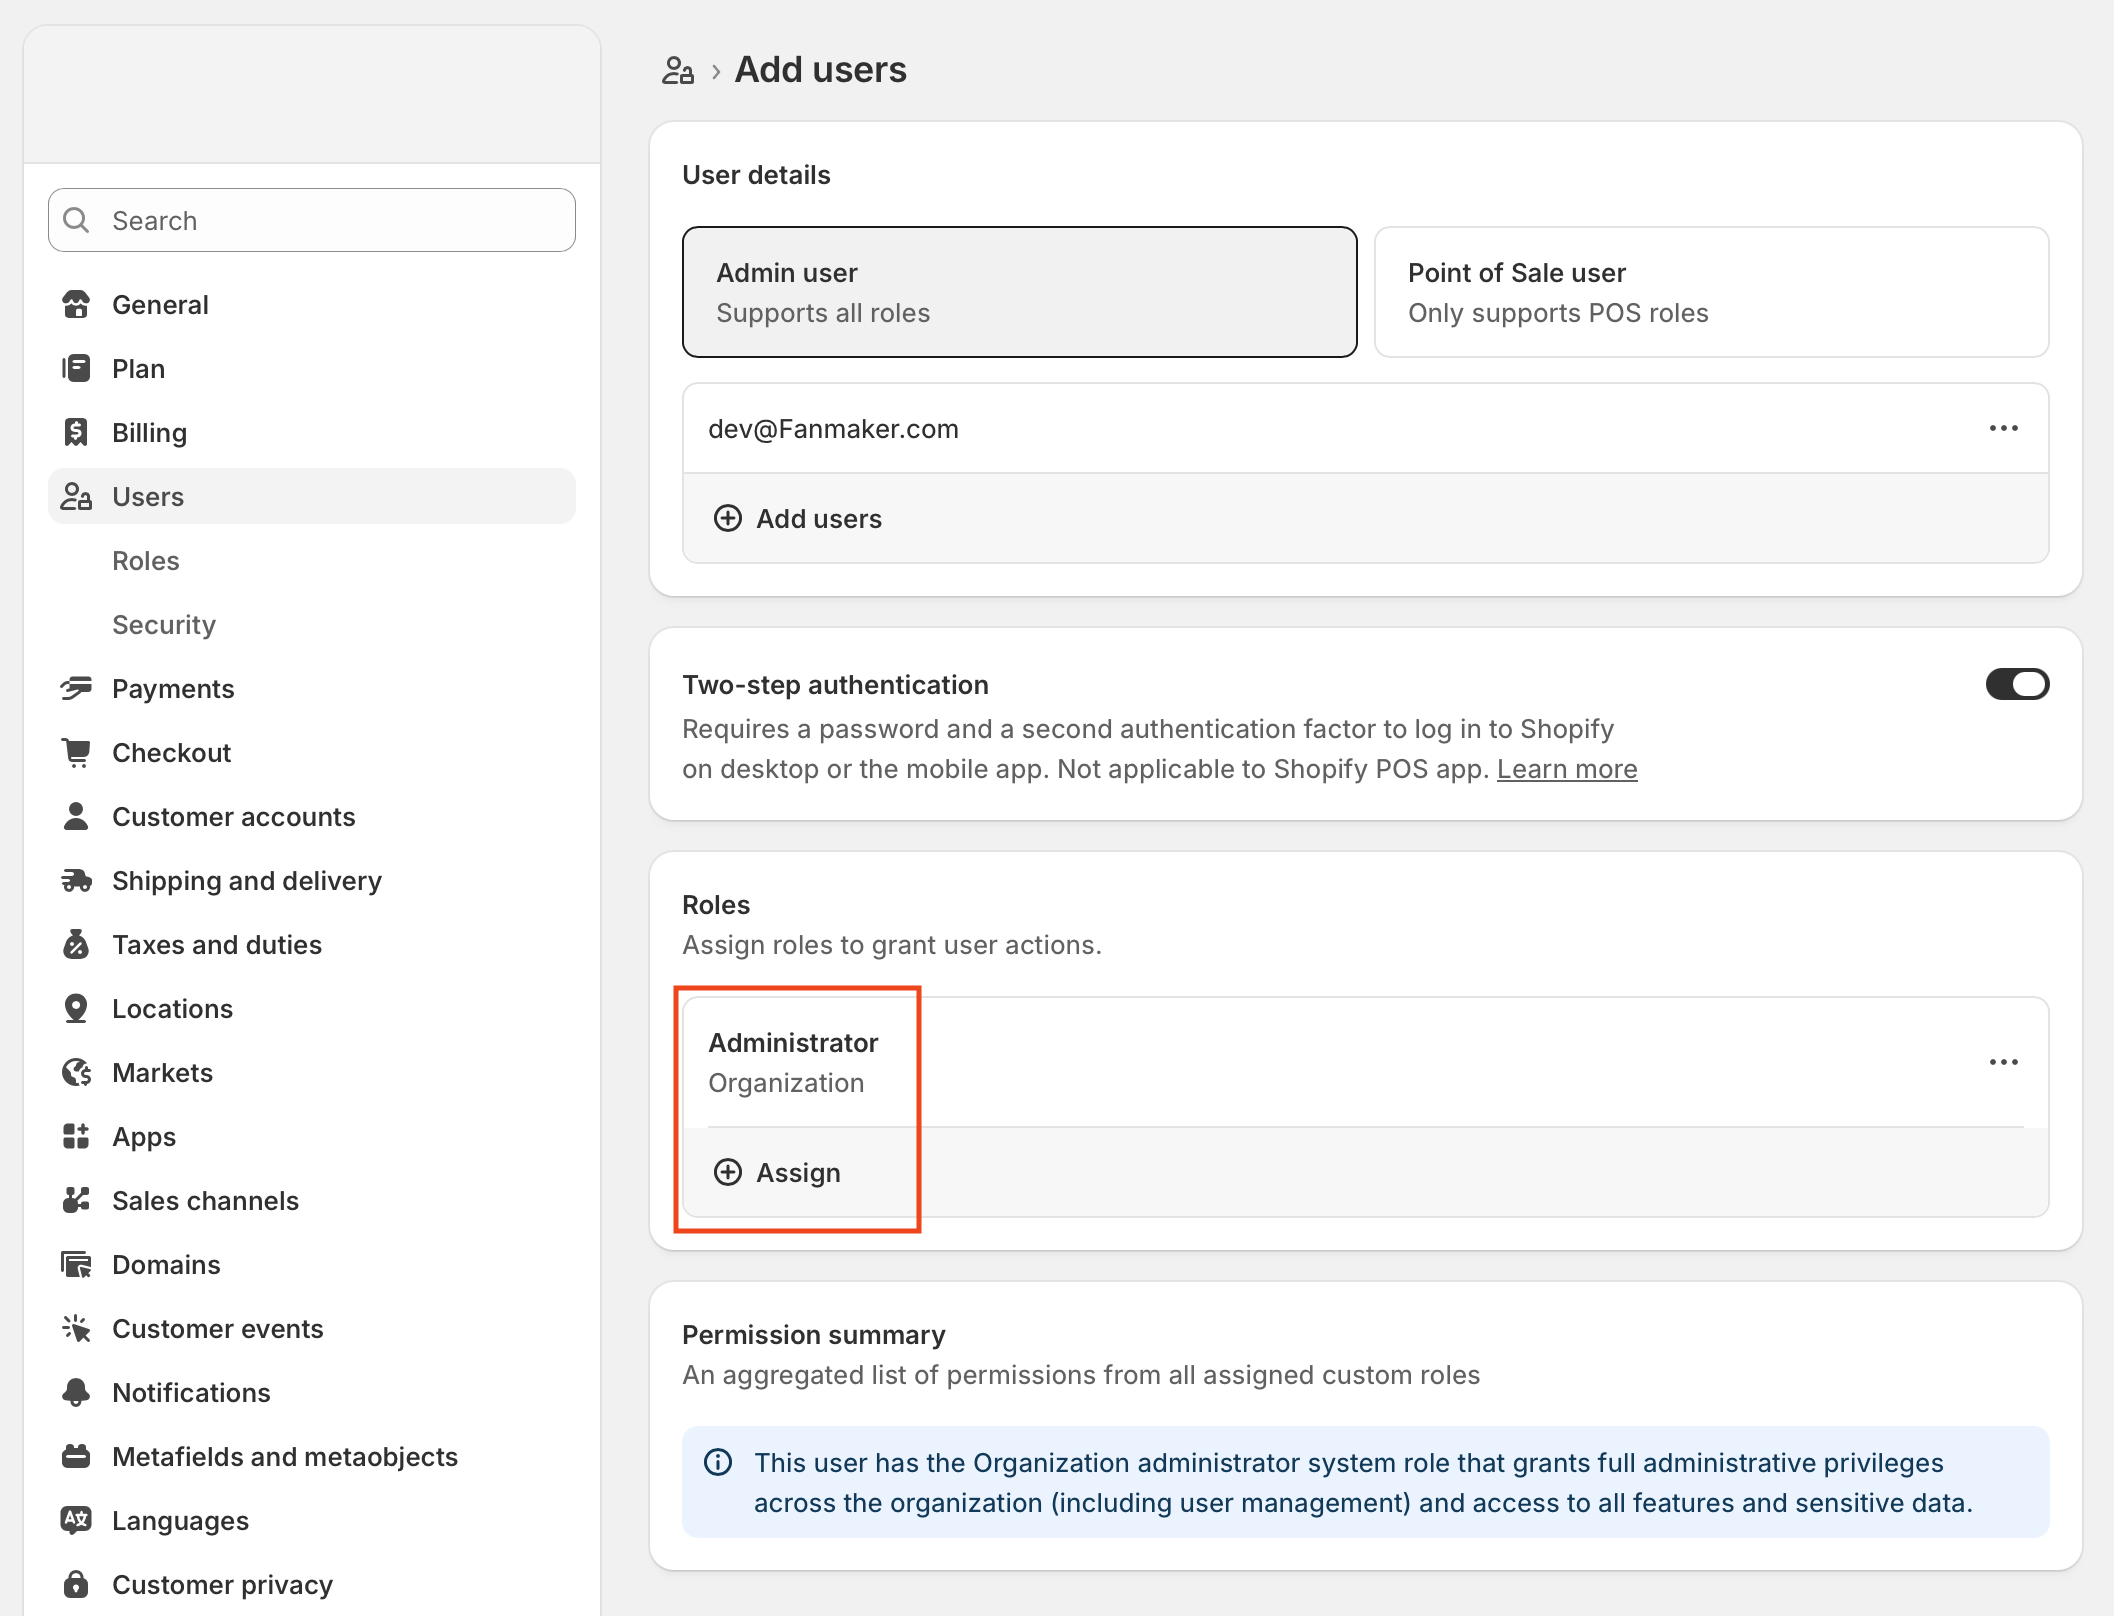
4. Confirm by clicking Add Users in the modal.
1. Once the details are filled in, look for the "Unsaved changes" bar at the top of the screen.
2. Click Save to send the invitation to the Fanmaker team.

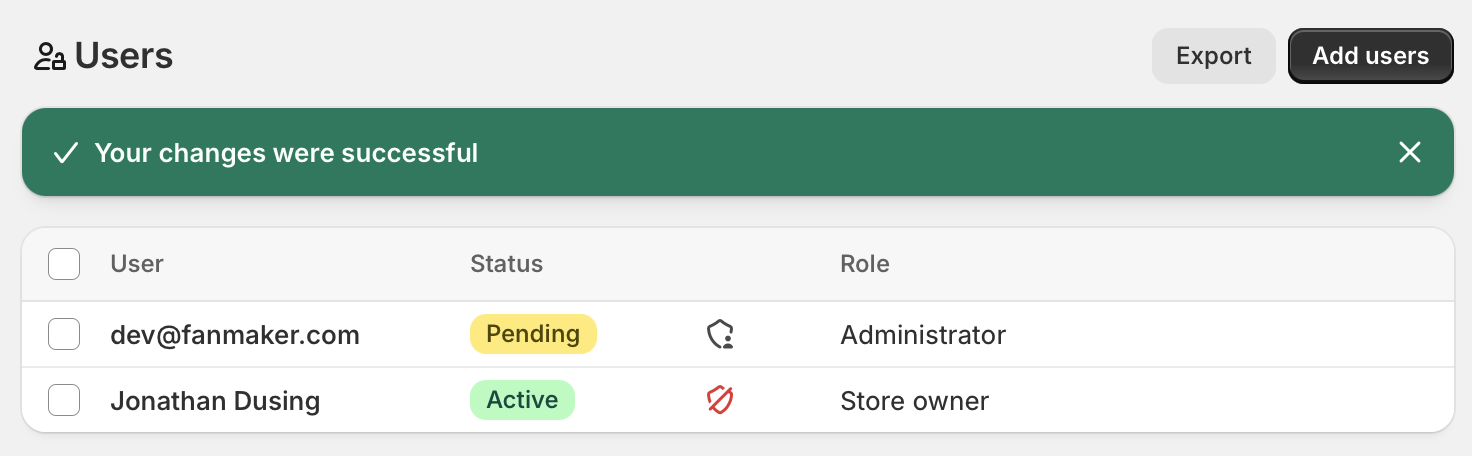
You'll see a green banner confirming "Your changes were successful" once the invite is sent.
Once we receive the invitation, our team will:
1. Log in to your Shopify backend.
2. Configure the Fanmaker private app and webhooks.
3. Set up the Fanmaker side of the connection — the store URL, the link fans follow to your store from the app, and your points-per-dollar rate. This lives on a page reserved for Fanmaker staff, Settings > Connections, so your Fanmaker contact handles it for you. Just tell them the rate you want.
4. Verify the data flow between Shopify and your Fanmaker admin.
Once you're connected, purchases start appearing under Point of Sale > Transactions.

