CrowdCameo galleries are managed here in the admin
Events › CrowdCameo opens the Galleries list — every CrowdCameo gallery that has happened and any that are set up for the future. Each row shows the gallery Name, its Date, the number of photos submitted, and its Status (Upcoming, Live, or Ended).
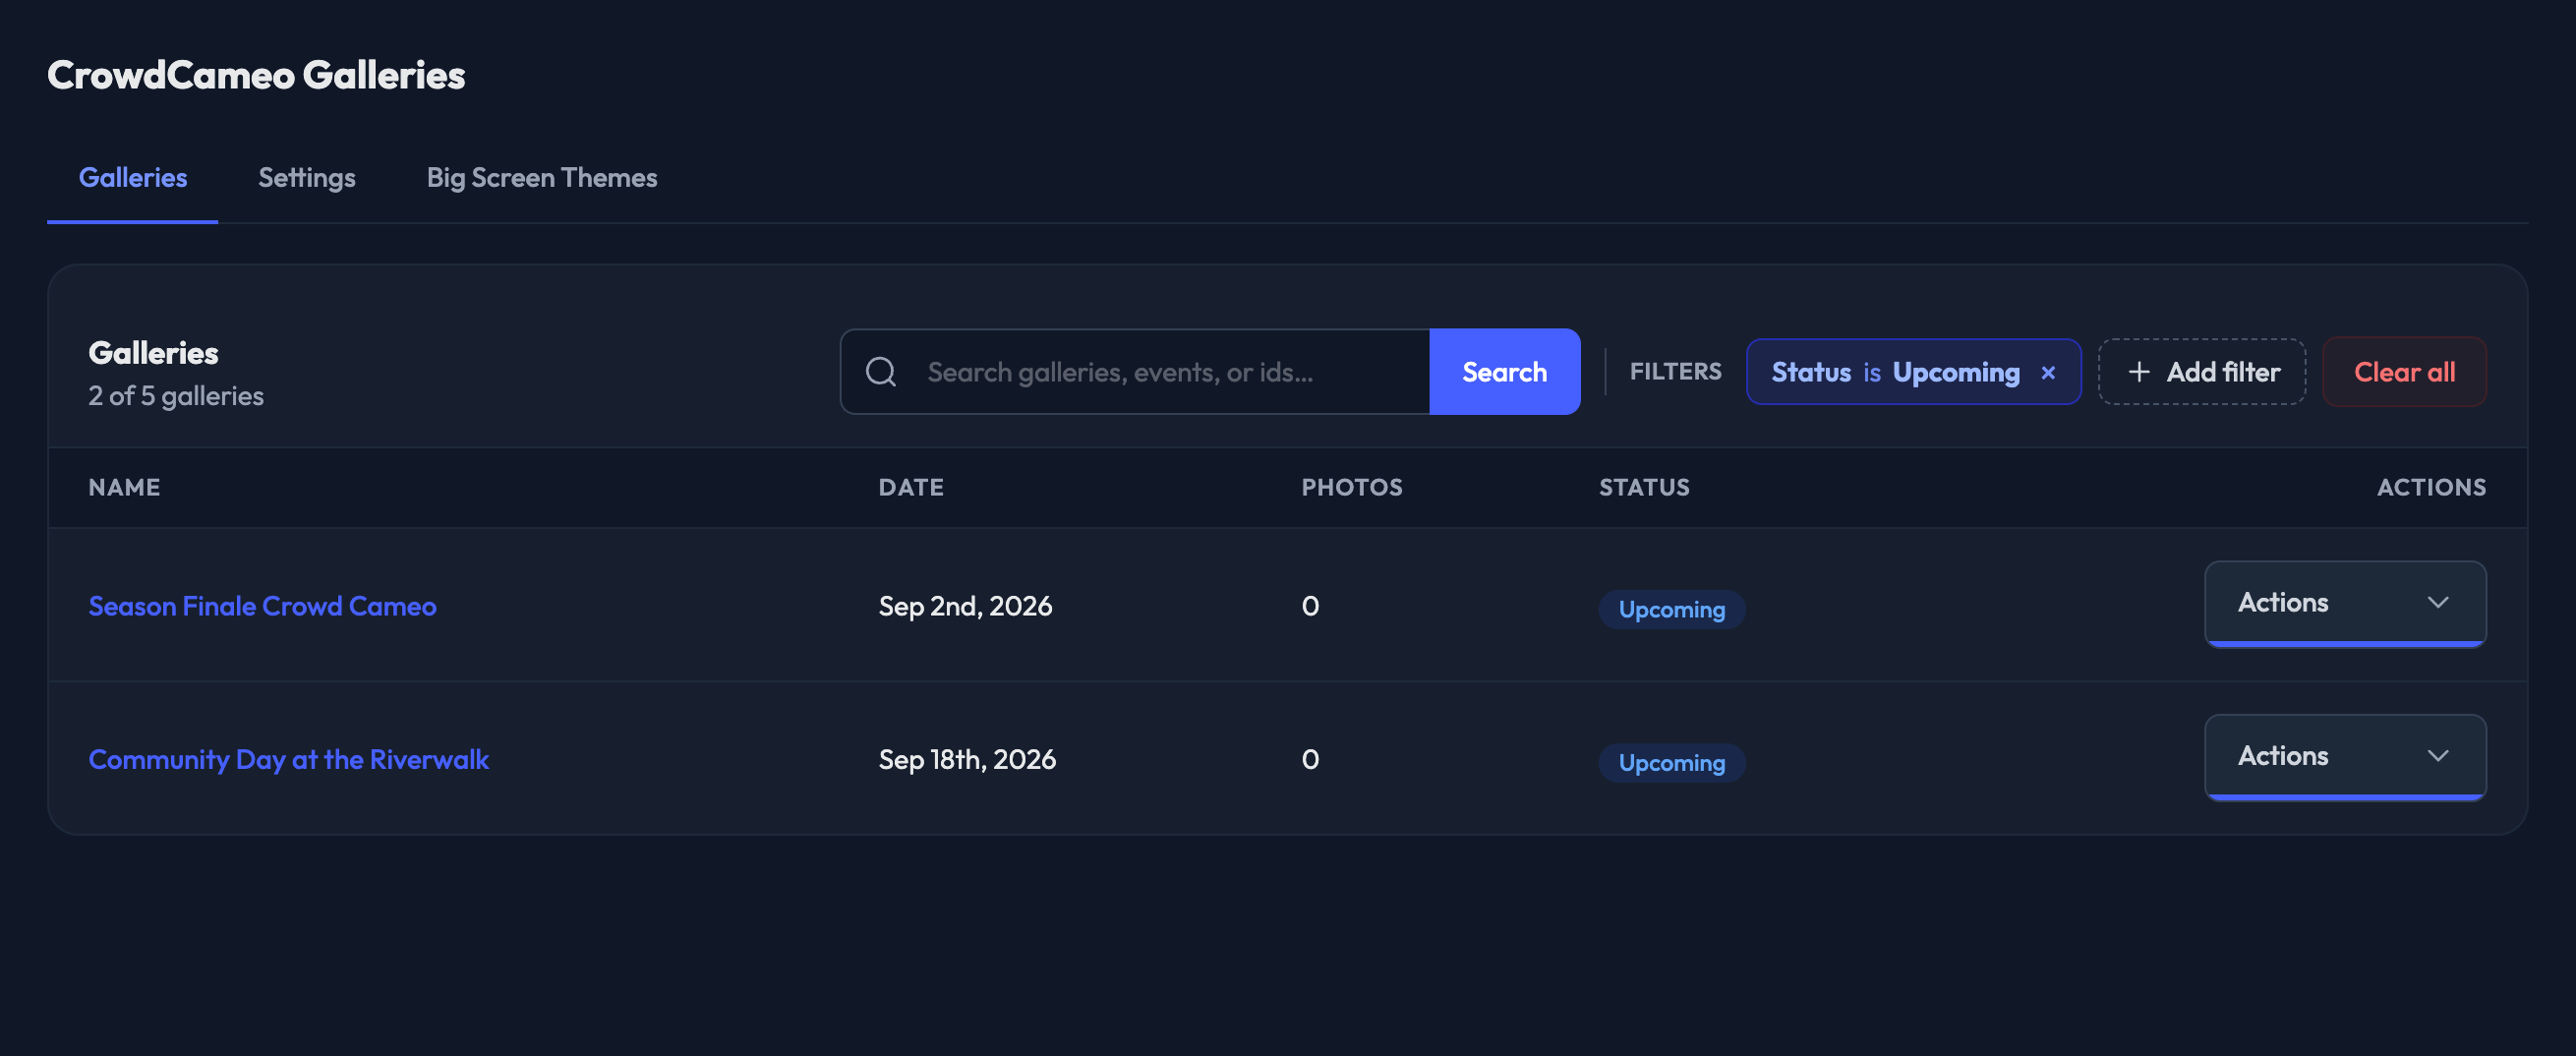
The list is filtered to Upcoming galleries by default, since those are the ones you are usually working on. Use the Status filter to switch to Live or Ended, or clear it to see everything. The search box finds galleries by name, by event name, or by id.
Each row's Actions menu has two entries:
Manage — opens the gallery's own page, where you edit its settings.
Photos — opens the moderation grid for that gallery.

Click the gallery name, or Manage in its Actions menu. The page opens on Overview, with counts of Pending Photos, Approved Photos, and Total Photos, followed by the Gallery Settings card.
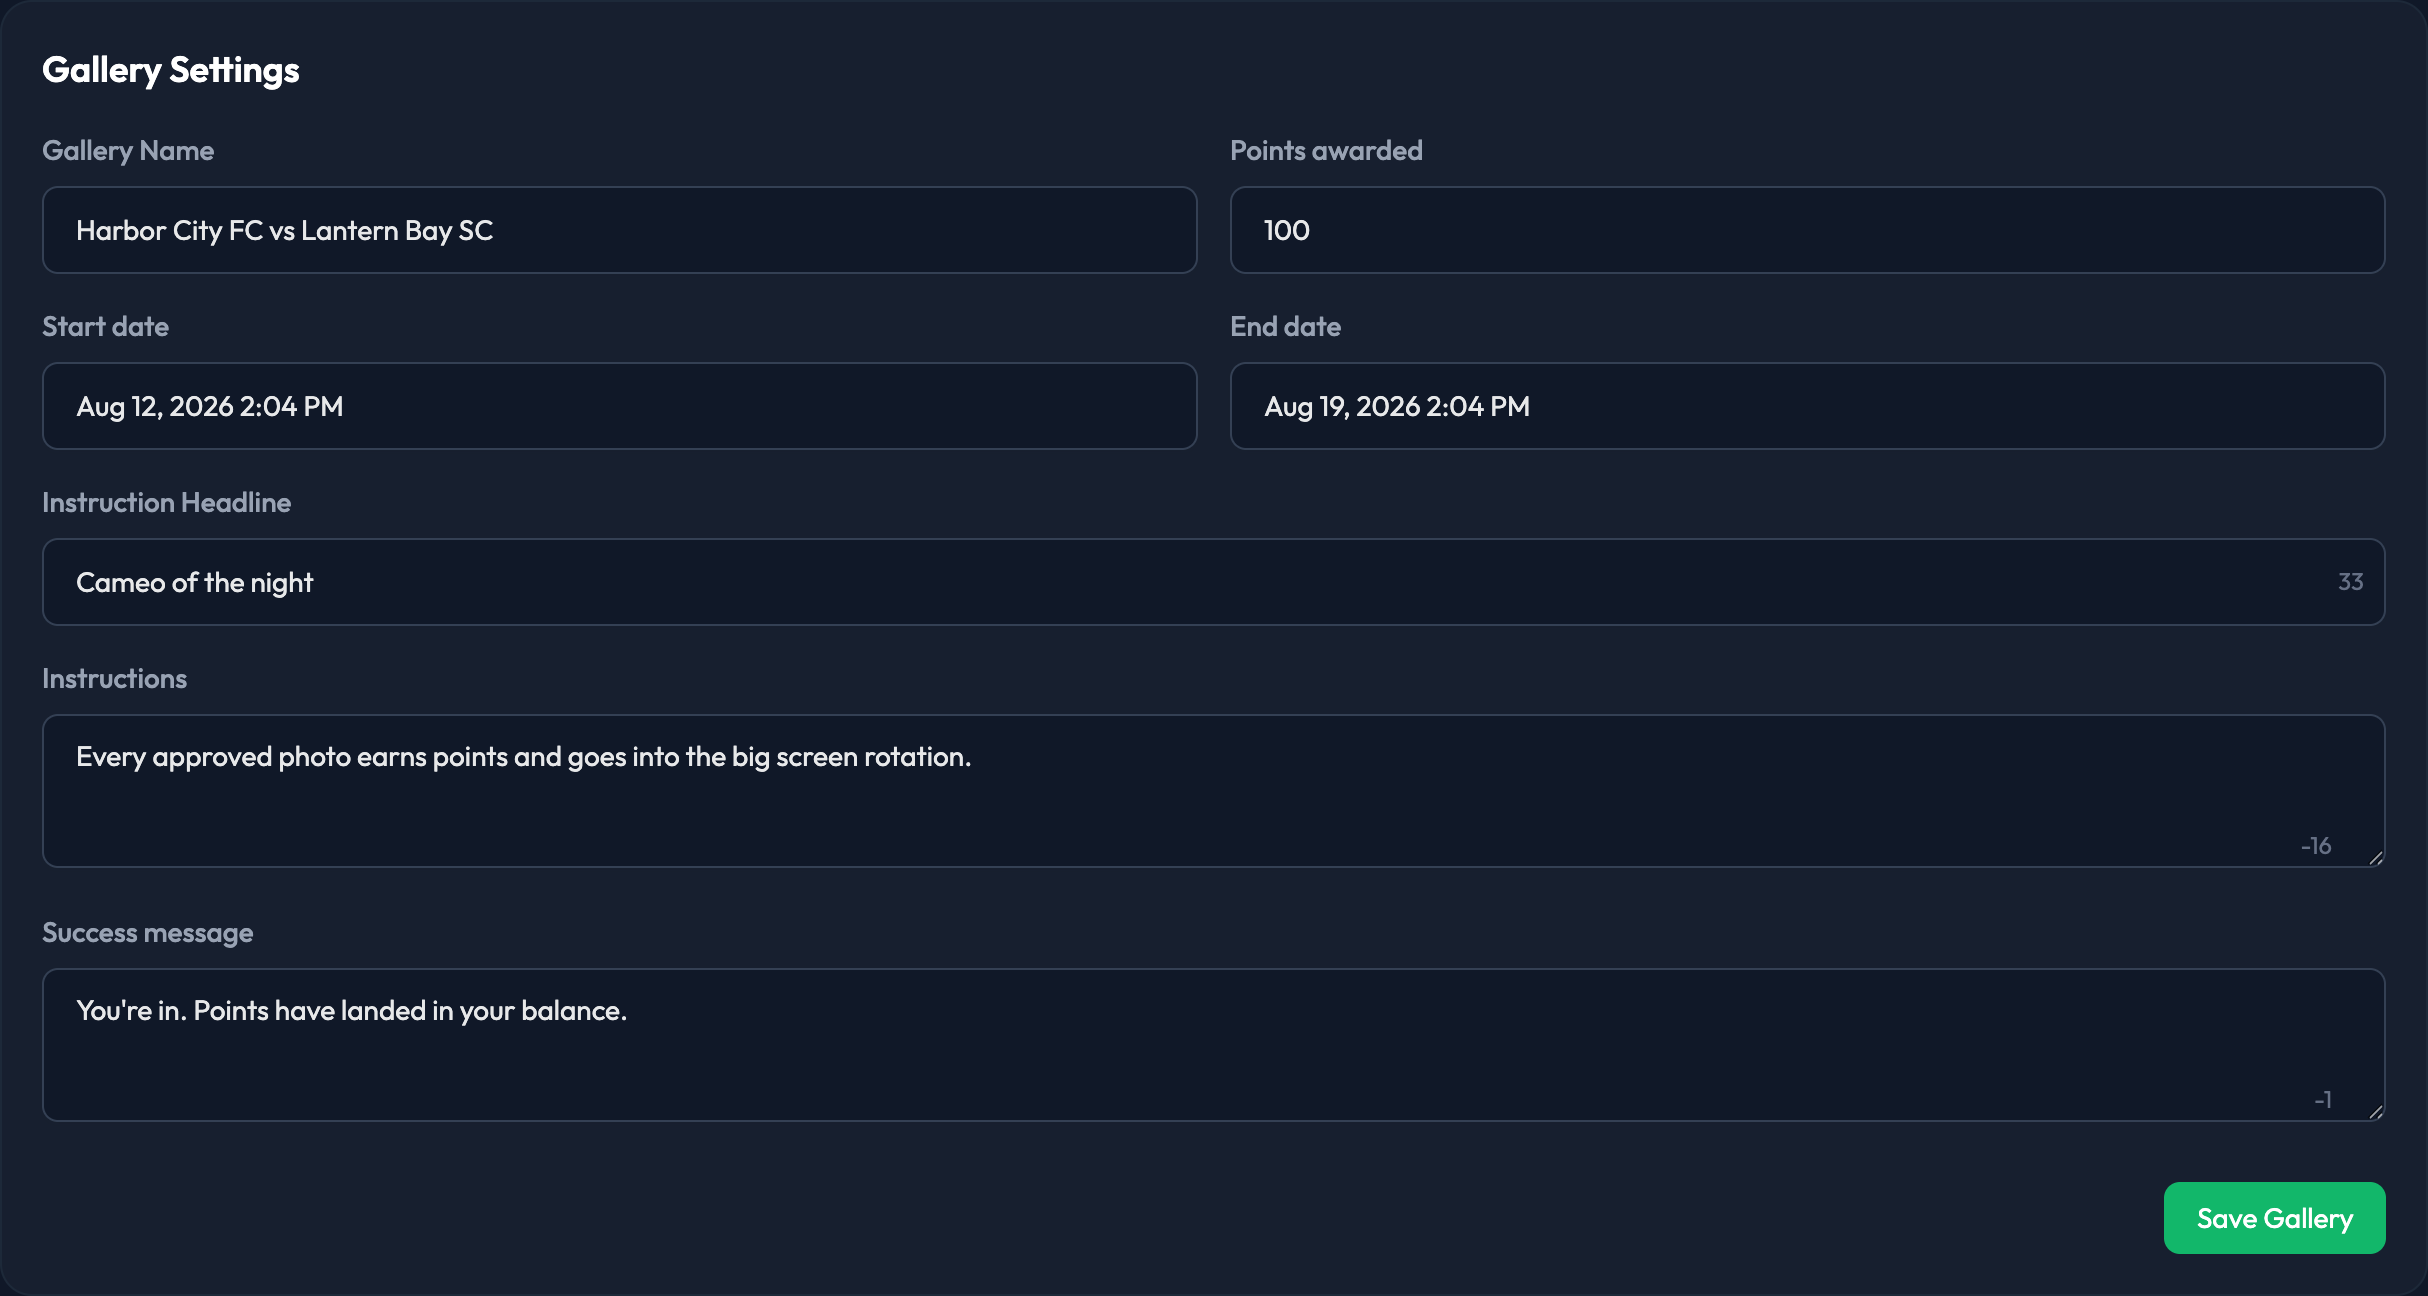
1. Gallery Name.
2. Points awarded — what members earn for submitting a photo.
3. Start date and End date. Best to coincide with your event duration. Both take a time as well as a date.
4. Instruction Headline — displayed next to the button to upload a photo in the app.
5. Instructions — displayed below the Instruction Headline.
6. Success message — replaces the Instruction Headline after a member uploads a photo.
7. Click Save Gallery.

Across the top of the gallery are its tabs: Overview, Photos, and — where Big Screen is enabled for your site — Big Screen.
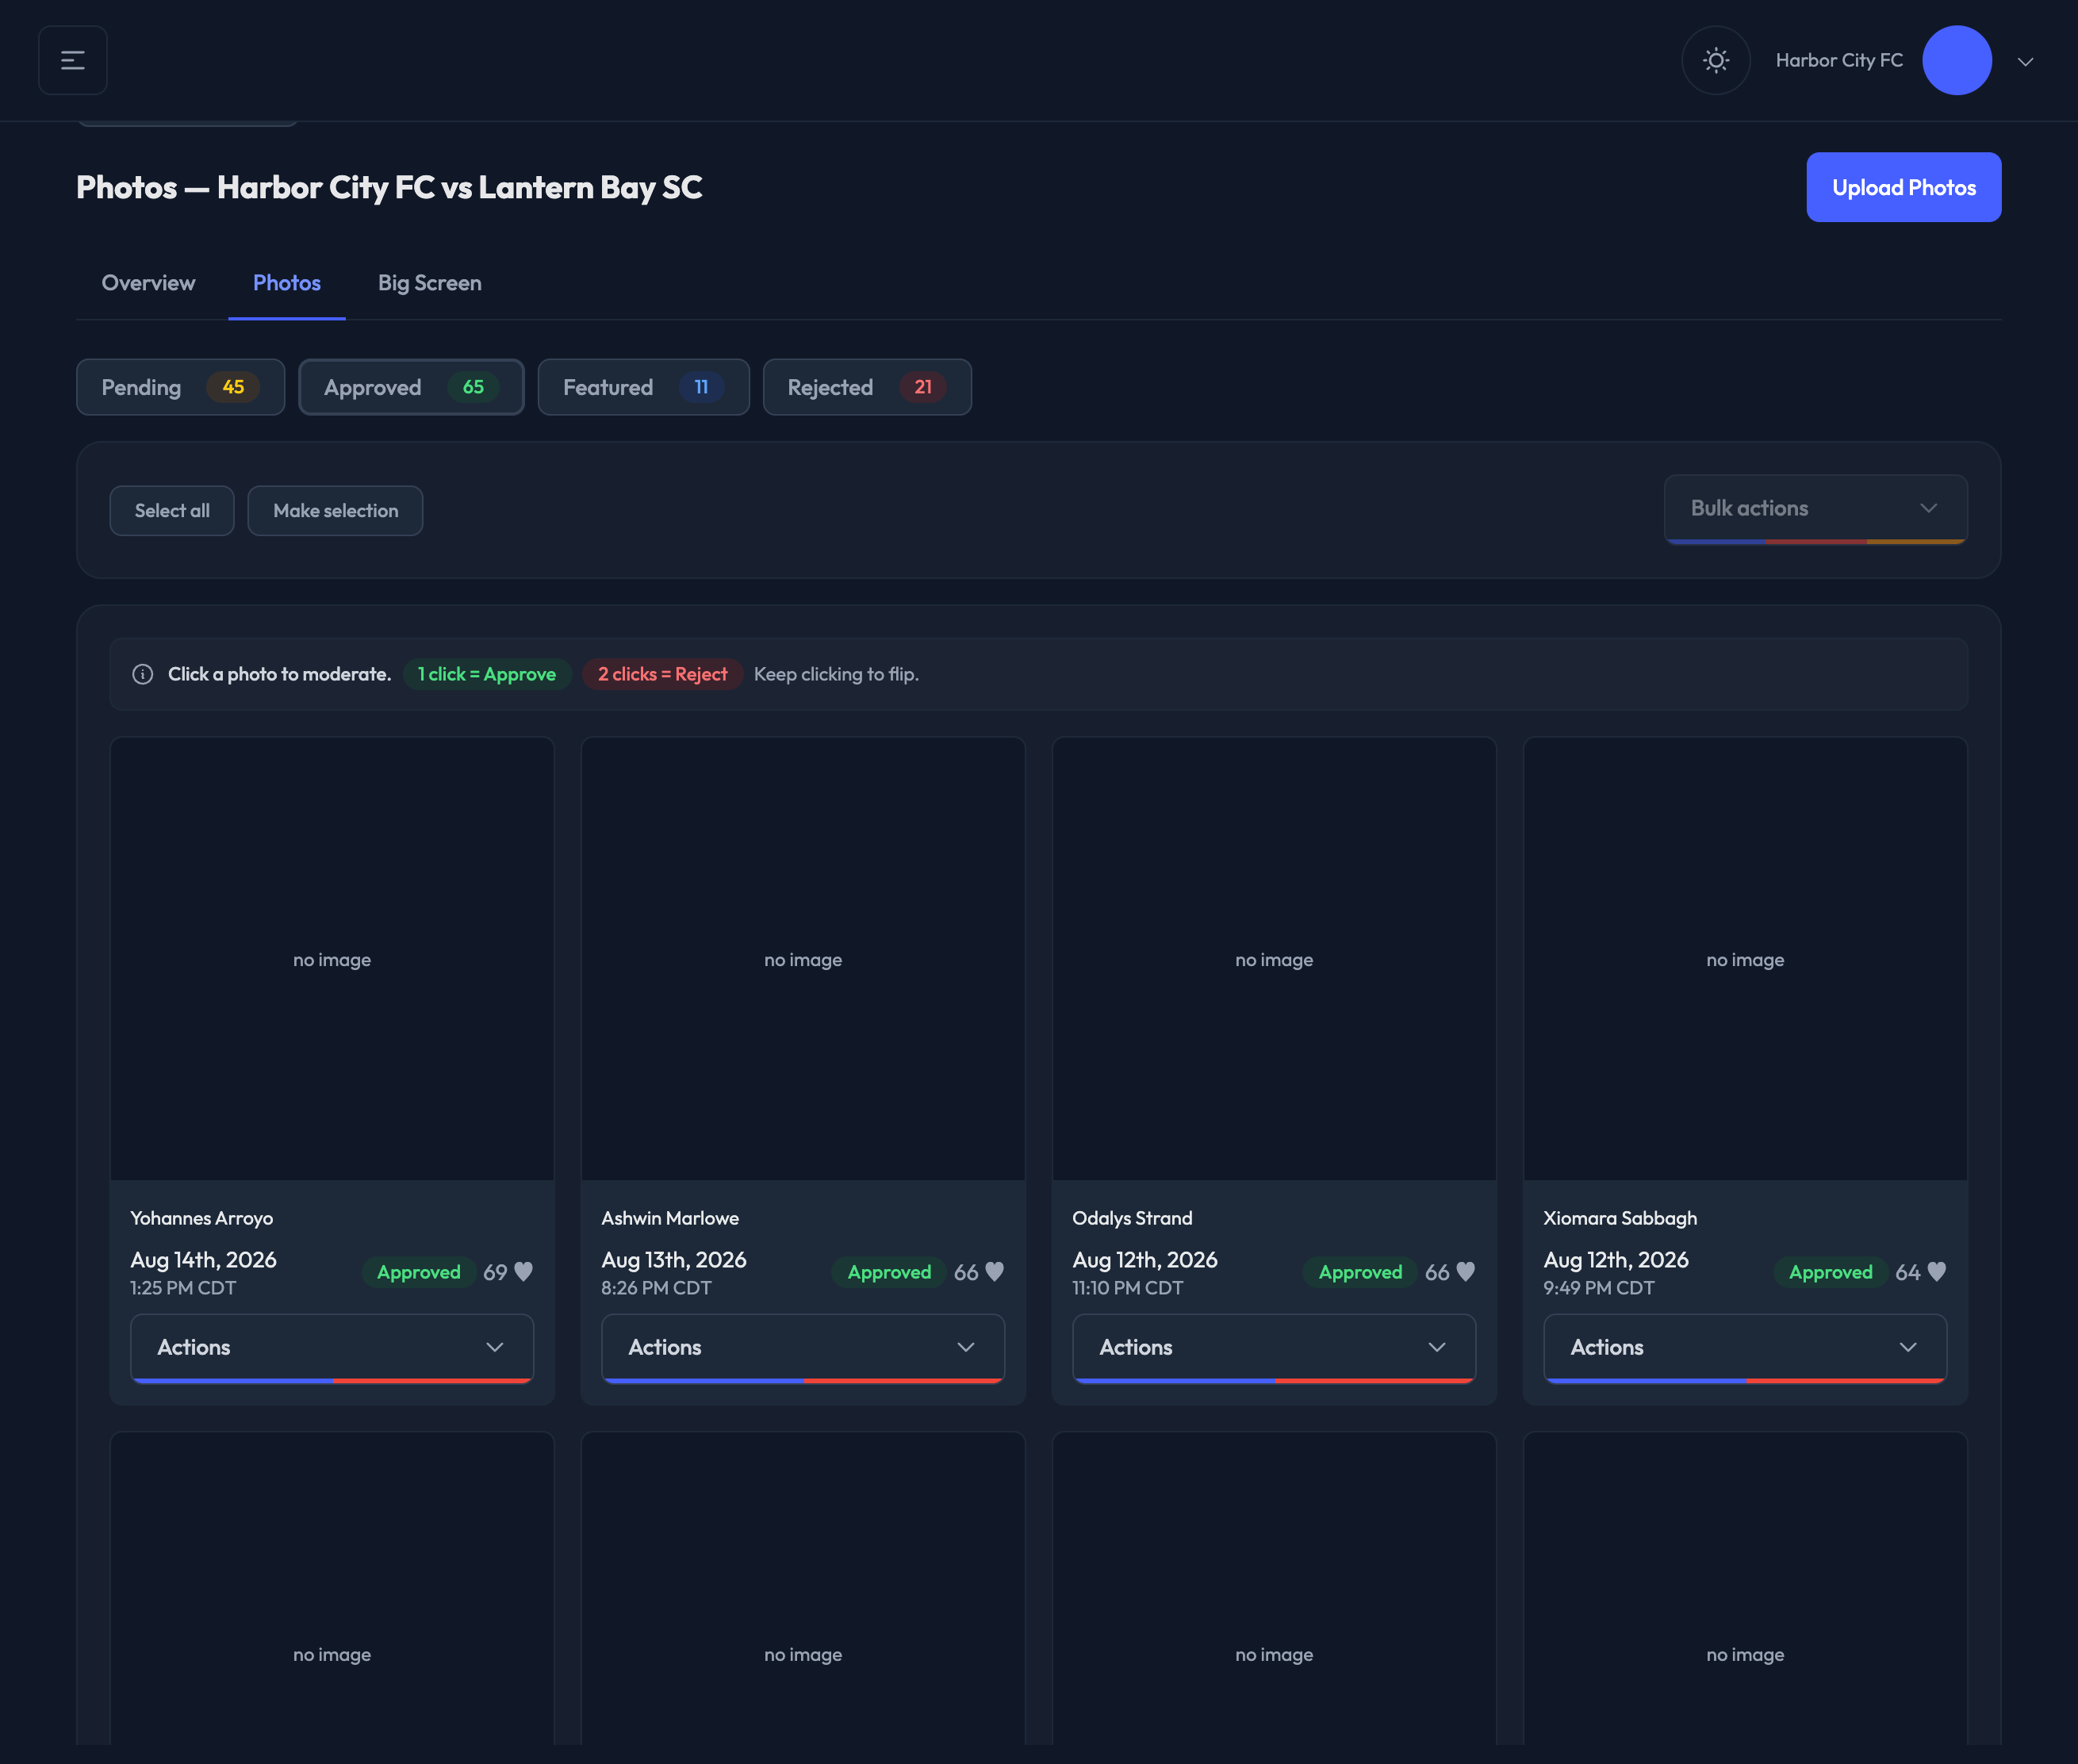
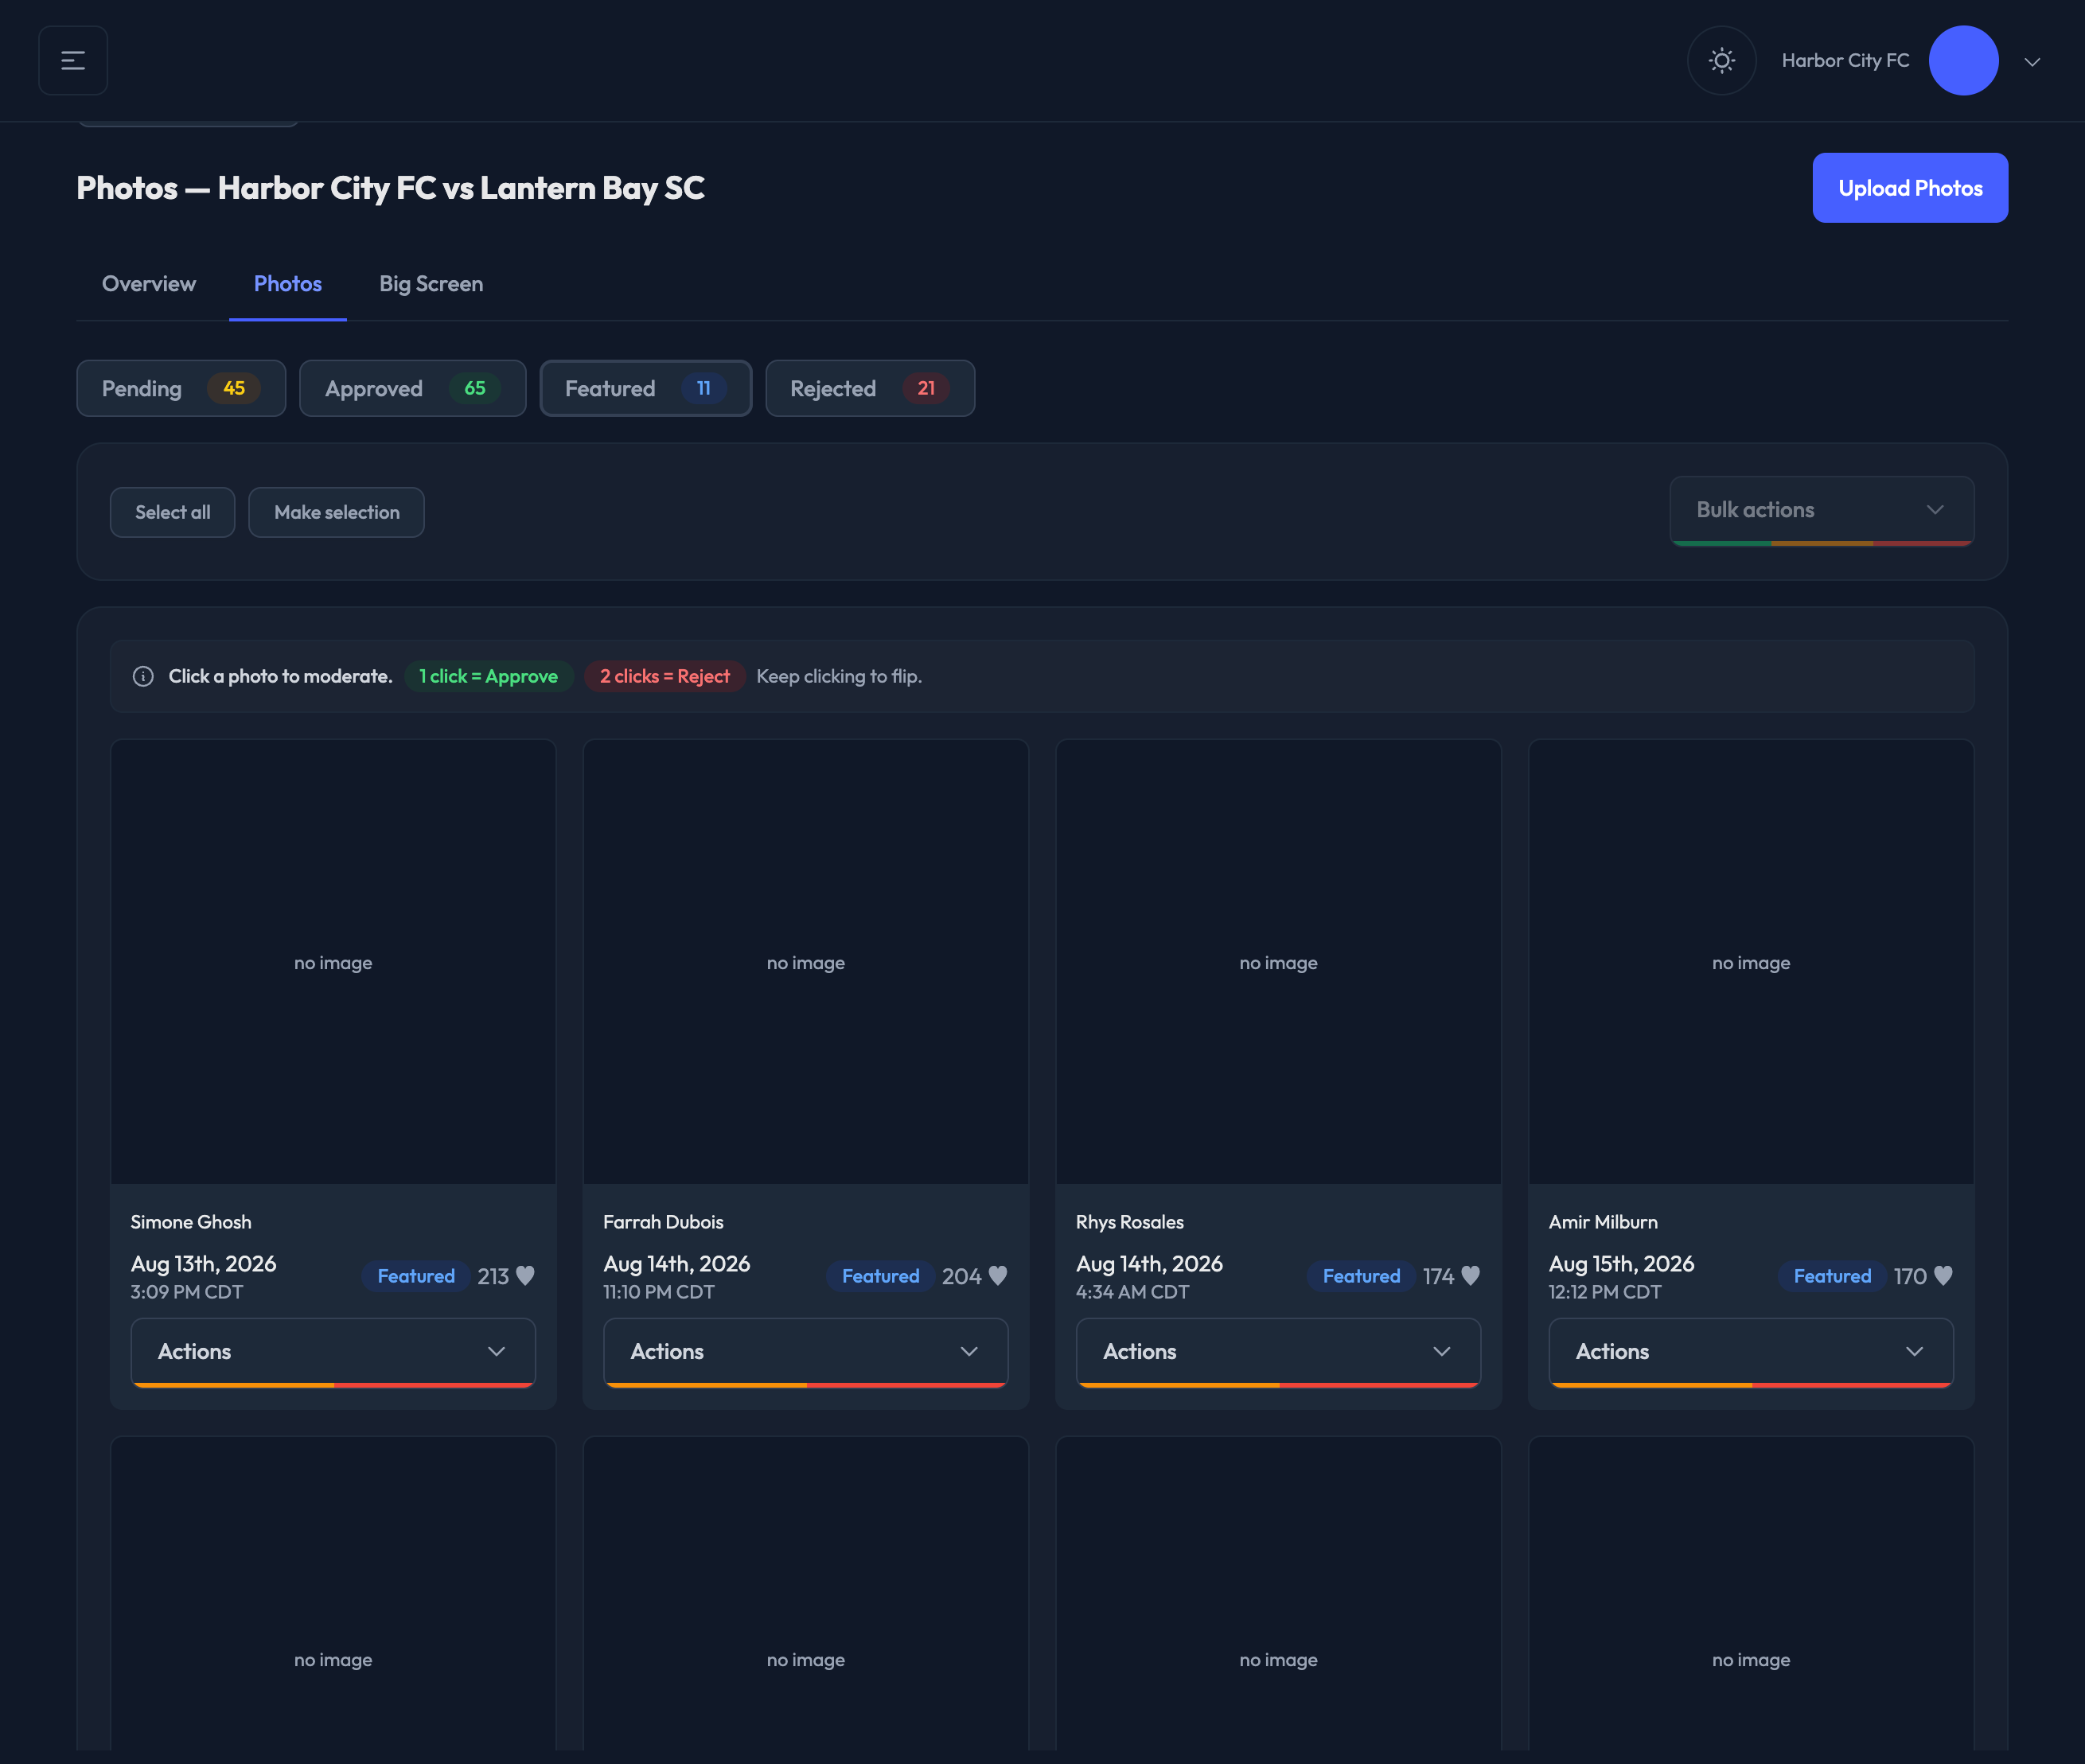
The Photos tab is where you review fan uploads. You do not need to do it live: photos can be moderated at any time, during or after the event. If you are not auto-approving (see CrowdCameo Settings), new photos wait in Pending until you review them. Above the grid is a row of filters — Pending, Approved, Featured and Rejected — each with a live count. The page opens on Pending.
Moderation happens on the photo itself:
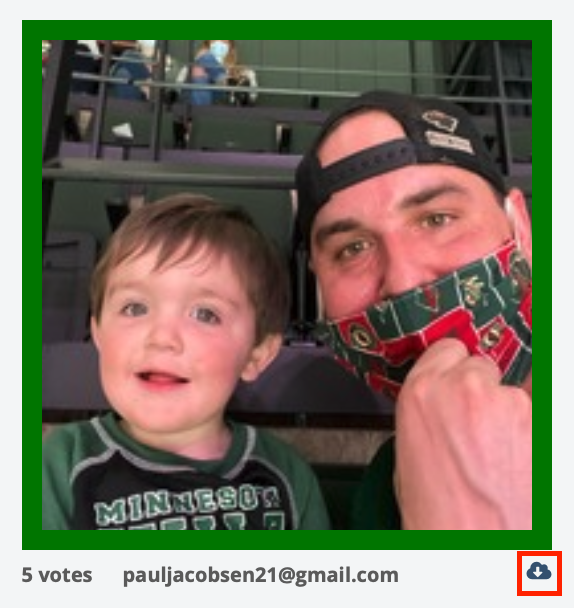
One click approves it, and a green frame appears.
Two clicks rejects it, and a red frame appears.
Keep clicking to flip between the two.
Your decision is saved about a second after your last click, so a mis-click is fixed by clicking again rather than by undoing something that already happened. If a save fails, the photo goes back to the state it was in and says so on the card.
Each photo card also has an actions menu with Featured and, for full admins, Delete.
Photos that have been submitted but not yet approved or rejected. Members are not able to see photos with a pending status.
All of the approved photos in this gallery — the ones members can see.
Featured is a highlight layered on top of approved: a featured photo is still public, it is just marked as one to lead with, and featured photos appear first in the gallery members see. Feature a photo from its actions menu. On the Featured filter that same menu offers Un-mark featured, which returns the photo to Approved rather than to Pending.
All of the rejected photos in this gallery. Rejected photos are not shown to members and cannot be featured.
The toolbar above the grid handles batches:
1. Click Make selection to switch into selection mode, then click each photo you want. Selected photos stay bright with a dotted outline; the rest dim. Select all does the same thing with everything already picked.
2. Open Bulk actions and choose Mark Approved, Mark Featured, Mark Rejected, Mark Pending, or Delete. The menu only offers moves that would actually change something on the filter you are looking at.
3. Cancel selection takes you back to click-to-moderate.

Upload Photos at the top right of the Photos tab lets you add images to the gallery yourself. Pick one or more PNG or JPEG files, up to 15 MB each, and click Upload & Feature. They publish immediately as featured photos under your site's gallery admin account — no points and no starting votes — and are labelled Admin upload in the grid.
